Thursday, September 5, 2013

Corn onion pakoda

I know all reading this recipe will curse me saying “she is posting this recipe now when rains have gone”… So first I apologize for delay… Had been busy so couldn’t upload…

          So here is a simple snack for evening tea… A little variation from usual Onion bhaji…

Ingredients

1 cup American corn
1 cup sliced onions
1 medium boiled and mashed potato
2 finely chopped green chillies
Finely chopped coriander leaves
Salt to taste
Red chilli powder to taste
Oil for frying
2 tablespoon rice flour
1-2 cups besan or chickpea flour

1.    Roughly crush American corn in mixer. Don’t make a fine paste.
2.    In a bowl add the crushed corn, onion, mashed potatoes, green chillies, coriander leaves, red chilli powder, rice flour, salt to taste.
3.    Mix all ingredients very nicely. Don’t add water.
4.   Now add besan 1 tablespoon at a time to make a thick batter just like we make for onion bhajis. If required now you can add little water.
5.    After you get the required consistency, adjust salt & red chilli according to your taste.
6.     Heat the oil in a kadai.
7.    When the oil gets hot, lower the gas flame and with help of a wet spoon pour dollops of the above batter in hot oil.
8.   Fry till golden brown.
9.   Remove the pakodas and spread them over kitchen towel or tissue papers to drain excess oil.

10. Serve hot with ketchup or pudina chutney and hot piping ginger tea.


Note:

          In view of recent price hike of onions, you can omit onions for this recipe till the price of onions comes down… or you can add only 1 small finely diced onion, just to bring in the sweetness and crunchiness…

          Or else another option is, whenever you feel like having “kanda bhajiya” but price tag of onions don’t allow you, make this pakodas and satisfy your desire J


 Enjoy Cooking J


DMCA.com

Thursday, August 29, 2013

Sepu Bhaji Dosa

This  is a healthy breakfast item…

          Sepu bhaji as its commonly known also known as Dill in English is rich in Iron…It is said that eating this leafy vegetable, while a woman is lactating helps in increase of production of milk and relieves back ache which is common for new born mother…Usually it is used in making of Idlis, Dosas, Salads or Dal Wadas…

          Many people don’t like its strong smell, but I always loved its strong aroma…

          This is traditional recipe learnt from my Aayi…It is also called Sweet Dosa or methi dosa when done without addition of the Sepu leaves…  This dosa is easy to make and also best way to serve to kids who don’t like this veggie…

Ingredients
2 cups of rice
1 tablespoon methi seeds
½ cup poha
1 bunch of sepu / dill leaves
½ cup grated coconut
Jaggery / gul according to taste
Pinch of salt and haldi

1.    Wash and soak rice and methi together for 5-6 hours. Soak poha 10 min before grinding.
2.    Then drain the water and grind to fine paste along with all other ingredients.
3.    The batter shouldn’t be too thick or too thin… it should be little bit thick than normal dosa batter…
4.   Keep it aside for fermentation overnight.
5.    Next day adjust the batter consistency.
6.   Take a non stick dosa pan and heat it.
7.    When the pan is hot, lower the gas flame and pour a ladle of the fermented batter.
8.   Pour little bit of ghee over it, cover it and allow to cook.
9.   When the dosa is brown in color turn over and allow the other side to become brown.
10.  Serve hot with homemade ghee or butter.


Note:-

1.    Leftover batter can be used to make appe or small pancakes.
2.    If you don’t get the leaves, no worry, follow the recipe just omit the leaves part.


Enjoy cooking…


DMCA.com

Wednesday, July 17, 2013

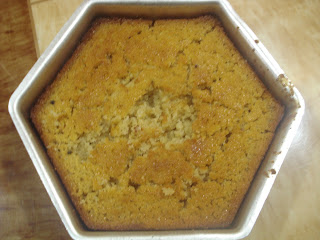
Rawa Cake


This recipe is from my mom’s treasure J
This is a healthy recipe for kids who hate milk, dahi & ghee… This recipe also has health benefits as it doesn’t contain maida…

Ingredients

1 cup dahi
1 cup sugar
1 cup milk (cold or at room temperature)
1 ½ cup jada rawa
½ cup melted ghee
½ tsp soda
Pinch of salt

·         Mix dahi, sugar & milk till sugar melts.
·         Add other ingredients & keep aside for 3 -4 hours.
·         Add dry fruits & kismis if you like.
·         After 4 hours pour this mixture in a greased tin.
·         Pre heat oven at 180 ‘C for 5 min
·         Bake the cake at 150 ‘C for 30 min or till knife comes out clean.
·         If you don’t have oven or OTG, don’t lose heart, you can bake in pressure cooker.
·         Pre heat cooker for 5 min without rubber (gasket) & whistle.
·         Keep an upturned vessel below; above this, keep the tin with cake mixture.
·         Cook for 40 min or till knife comes out clean on low flame.

Note: if you like you can add few drops of rose or pineapple essence.

Happy baking J
DMCA.com

Sunday, June 30, 2013

Healthy Cake..

When you say “Cake”, all one can see before their eyes is lots of maida, cream, beating of eggs till fluffy or separating of eggs, etc…But I am sure all mothers whose kids are cake lovers will definitely love this recipe…

      And yes cakes can be made from atta also…

     I got this recipe on a Marathi cookery show. What I loved in this recipe is that no maida, no beating of eggs till fluffy & with carrots & apple. I loved this recipe at once. So now its once-in-a-month, this cake is baked at our house… everyone loves it……

    When I 1st made it everyone was shocked to learn that it was made with minimal amount of maida… you surely will love this cake…

Ingredients

2 eggs
1 cup sugar
½ cup butter
¼ cup maida
¾ cup atta
1 tsp baking powder
¼ tsp baking soda
2 tbsp cocoa powder
1 cup grated carrot
½ cup grated apple
Dry fruits  
1 tsp Elachi powder or vanilla essence

·         Beat the eggs a little.
·         Powder the sugar & then add it to the eggs along with butter.
·         Mix till sugar melts.
·         Add elachi powder or essence.
·         Sieve thrice, together maida, atta baking powder, soda & cocoa powder.
·         Add this to the egg mixture bit by bit.
·         Now add grated carrot & apple.
·         Also add dry fruits coated in maida/ atta.
·         Pre heat oven at 180`C for 5 min.
·         Pour the cake mixture in  a greased tin & bake at 180’C for 30 - 40 mins or till knife comes out clean.

Note:


  •   Instead of maida, add equal amount of atta.
  •   You can add choco chips on top to look like a chocolate cake.

Happy baking 


DMCA.com
Visit blogadda.com to discover Indian blogs

Saturday, June 22, 2013

Coleslaw..

     2 days back had gone to market for usual vegetable shopping & I was fascinated by small red/purple cabbages sold by the vendor…thought should give a try for its colour …
          So tried making a coleslaw… though not a perfect recipe, but somewhat similar

Ingredients

1 small red/purple cabbage
2 white/green cabbage leaves
1 medium sized carrot
1 tbsp lemon juice
2 tbsp garlic flavor mayo
2 tbsp dahi
Salt, sugar & black pepper to taste

1.    Wash & finely shred both the cabbages.
2.    Finely slice or grate carrot.
3.    Mix all the ingredients & keep in fridge to chill.
4.   Serve cold with chapatti or as a sandwich filling or with khakara…

Enjoy Cooking J


DMCA.com

Tuesday, June 18, 2013

Oondi...

This is traditional Manglorean breakfast recipe taught to me by my mother-in-law. Easy to cook & healthy & filling too…

Ingredients

1 cup idli rawa
2 cups water
1 tbsp + 1 tbsp oil
Salt to taste
Grated coconut
1 tsp mustard seeds
1 tsp urad dal

·           In a kadai take 1 tbsp oil & add urad dal & mustard seeds.
·           When it starts to splutter, add water, salt & bring it to boil.
·           When it starts to boil add rawa & coconut.
·           Keep stirring it till it forms a lump.
·           Turn off the gas & Cover it for few seconds.
·           Allow the mixture to cool.
·           Pre heat idli steamer.
·           Make small small oval balls of the cooled mixture & place it in the steamer for 10 min.
·           Serve hot with coconut chutney
 
Another version of this is a sweet one for people with sweet tooth J 

·         Avoid the 1st step. Instead directly keep water to boil. When it starts to boil, repeat the whole process as above but add ghee instead of oil.
·         After the rawa mixture is made, keep aside for cooling.
·         Meanwhile prepare jaggery & coconut mixture usually made for stuffing in modaks.
·         In a non stick kadai, take grated coconut; add jaggery (gul) according to your taste. Mix well. Add elachi powder. Stir till mixture is dry.
·         Now after both mixtures have cooled, take little of rawa mixture, flatten it on your palms & fill with sweet coconut mixture. Shape it in round or oval balls.
·         Now steam it for 10 min as above.
·         Serve hot with desi ghee.


DMCA.com

Sunday, June 16, 2013

Stuffed Mushrooms

Mushroom is one of my favorite vegetable…Many think of it as meat… but it’s a vegetable… I had got this idea while watching cookery show…though not the same recipe…made some changes …
          So here’s recipe for stuffed mushroom ……

Ingredients

1 pack button mushroom
1 medium tomato
1 medium onion
Few cloves of garlic
1 tbsp ginger garlic paste
1 tsp red chilli flakes/powder
1 tsp mixed herbs/fresh herbs
Salt to taste
Black pepper powder
Cheese to taste
Olive oil 1 + 1 tsp

1.    Wash nicely all the mushrooms under running water. Pat dry using kitchen towel.
2.    Remove the stalks of mushroom & finely chop them.
3.    Keep the round part of mushroom intact.
4.   Finely chop onion, tomato & garlic.
5.    In a kadai, take 1 tsp oils saute garlic till it smells, then add onion & ginger garlic paste.
6.   After onion turns translucent, add tomatoes & mushroom stalks.
7.    Add chilli flakes, herbs, salt & black pepper.
8.   Cook till all water is dried up.
9.   Remove it in a plate & allow to cool.
10. Stuff this mixture in the empty portion of the round mushroom.
11.  Cover it with cheese & sprinkle little herbs (optional).
12. In non stick pan, add remaining oil (if you want you can add butter), arrange the stuffed mushrooms & cover it & cook till cheese melts.

13. Serve hot as a starter with ketchup.


DMCA.com

Tuesday, May 28, 2013

Ginger Garlic Paste


“Now-a-days ginger garlic pastes are easily available in supermarkets, so why take so much trouble” is what some will say. But I was never satisfied with taste of readymade pastes.

With little effort we can make the paste in required quantity, easy on pocket & makes a huge difference on taste…

Ingredients

100 gms ginger
100 gms garlic
Green chillies according to your taste
1 tsp salt
1 tbsp Vinegar
2-3 tbsp oil


1.    Wash & pat dry ginger & chillies.
2.    Remove skins of garlic pods.
3.    In a mixie make a fine paste of ginger, garlic, chilli & salt.
4.   Add Vinegar.
5.    Heat the oil to smoking point & then let it cool a bit.
6.   Add the oil to the paste, mix well.
7.    Store in a glass container.
8.   It stays in fridge for nearly 6 months.

Notes:

·         You can make a paste of only ginger & garlic, or separate pastes in same manner & store.

·         Take care none of ingredients has water droplets.
DMCA.com